
Let’s start this post off with an Disclaimer:
We are not saying this is the best/only way to frame an old metal sign, it’s just the way that we decided to do it and we think it looks pretty good. It’s also a lot cheaper than having it professionally framed. Our frame had holes in it already, so this assumes the sign you are using also has holes. Usually vintage signs have been attached to something at some point in their life, so there are typically holes in them. Also this method gives us the freedom to remove our sign and do something else with it later if we choose to.
There. Glad that’s out of the way.
Things you will need
- Metal Sign (We got ours at a flea market for $25.)
- Store bought frame
- Canvas drop cloth
- Spray Adhesive
- Nails (any ones that fit in the holes of the sign should work)

Start off with your store bought frame. We are using a RIBBA frame from IKEA, but most large frames should work. The mounting brackets need to be installed before you get started since you want them to be under the canvas so they can’t be seen on the frame. They generally come with the frame or you can buy them in a framing package at the hardware store. Otherwise, you can just skip the brackets and lean the frame on a mantel, shelf, or other flat surface that you put frames on.
Side Note: If there is ever a TV show called “Hoarders: Ikea Ribba Frame Edition”, we’d probably be the first people on it. Seriously, one time we bought some from an antique mall, just because we thought it’d be funny to buy some from an antique mall (ok, they were a good deal too, but we definitely didn’t need them).

For the background, we used a canvas drop cloth. We got ours at Home Depot. You might even have one laying around from a recent painting project. If you want something with pattern or color, this process should work with other types of fabric as well.

Lay the drop cloth on the frame backing. Mark and cut the canvas leaving about 3 inches on each side of the backing.

Then pin the fabric on the edge you cut for hemming.
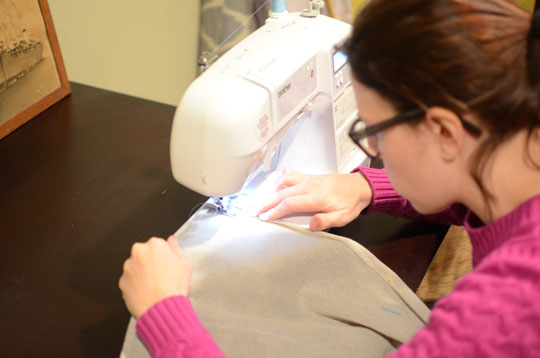
Then sew the hem. You can skip this step, but Amber can sew a straight line. We thought it would be easier to work with the fabric if it was cleanly hemmed, but it’s really not necessary. Also you could fray check the back if it really bothers you.
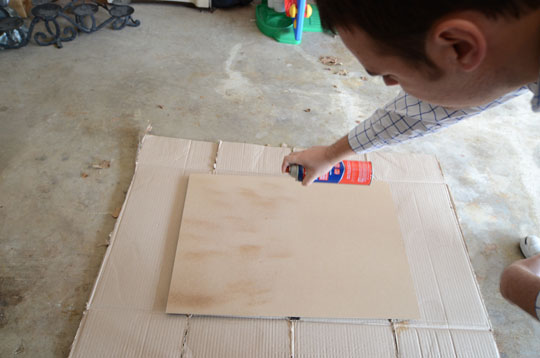
Spray some spray adhesive to the backing according to the packaging. I used some loctite adhesive that I got from WalMart. Then center and attach the fabric, making sure to work out bubbles with a putty knife.
Side Note: This isn’t a 2 day project, it was just late when we started. That’s why the lighting changed. It took me less than 2 hours to complete.
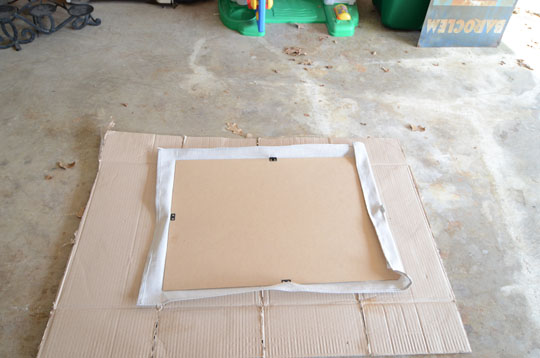
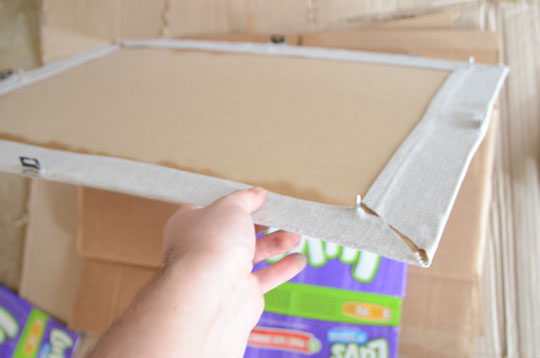
In order to be able to fold the fabric over, you’re going to need to cut holes for the black brackets that attach the backing to the frame. We cut and fray checked them.

Once the holes are cut, also cut the corners so there’s not bunching. Fold the remaining fabric over and using the spray adhesive, stick it to the backside of the backing. If you installed the brackets, you will need to make sure you don’t have fabric covering them at this point either.
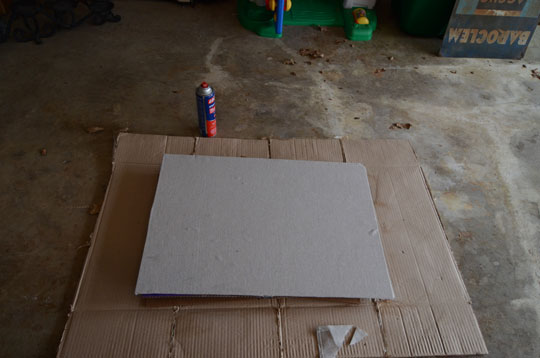
Flip it around and smooth out any reamining bubbles.
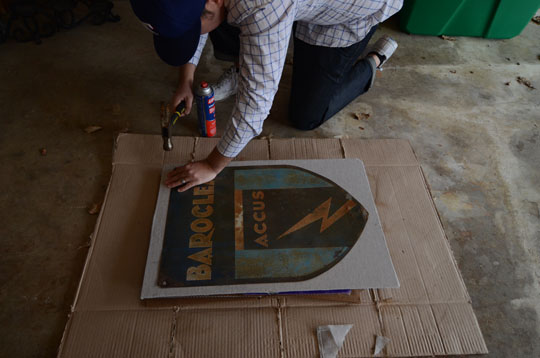
Support the backing from underneath so you can hammer on it. I used a stack of cardboard boxes, specifically old diaper boxes (because I’m classy).
Hammer the sign onto the backing. I used 7/8″ roofing hammers because the heads were big enough that they wouldn’t go through the holes in the sign.
The nails will stick out the back, so cut off the pointy edge with wire cutters.

Back Inside:
Pop the sign that is now attached to your canvas coated backing into the frame. If you installed the bracket (see zoomed in above), you can run the wire through and hang your DIY greatness up.
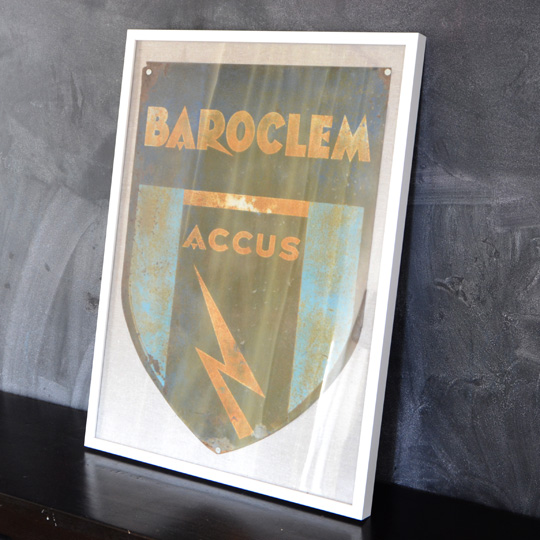
Done. Boom! That just happened. Your new art work is a little bit vintage, a little bit modern and a whole lot of awesome. I suggest you make yourself a cup of coffee and enjoy looking at your masterpiece.


Pingback: We are Minimalists?? | Wills CasaWills Casa